Installing the Demo Content
- Home
- RT-Theme 19
- Installing
- Installing the Demo Content
IMPORTANT NOTE:
These sample contents may contain some copyright protected materials. These images/videos are not included to your purchase. If you copy or import one of our demo content images/videos to use in your website then you need to have your own license. Purchase links and copyright details can be found inside the document file that included into the “All files and documentation” package where you can download from your themeforest account.
This step is optional, if you would like to replicate the demo website contents of the theme you can just import them. There are two ways to import the demo contents;
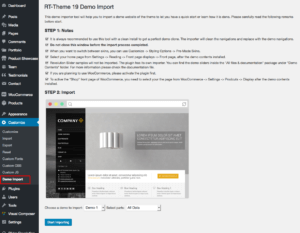
- Installing by automatized tools that you can find under Customize ▸ Demo Import
- Installing by using WordPress’s native import tools.
1) One click demo import
Go to Customize ▸ Demo Import page and follow the screen instructions.
2) Install manually
2-1) Import content samples
Before starting:
- In order to get copies of Product Showcase, Team, Testimonial contents you must activate RT-Theme 19 Extensions Plugin and for sample WooCommerce products, activate WooCommerce Plugin.
- Make sure wordpress import plugin has been installed and activated
Steps:
- Go Tools → Import, click WordPress
- Click the browse button and select the XML file of your selected demo on your computer. It is located in the “Demo Contents” folder that comes with “All files and documentation” package.
- Hit “Upload file and import” button and follow the screen instructions.
Import Error Messages
- When you import the demo content and Woocommerce is not active you might see some import errors after the import process. This is normal.
- You most probably get tons of notification after the import because the plugin’s current version is still using one of the old WordPress functions. But it still functioning well so you can just ignore them.
- This is not our plugin and we have no control over it!
Importing to a WordPress Multi Site install
When you import the demo content running a WordPress multi site (wpms) make sure you set the file types extensions that are allowed to import properly otherwise you get import errors. You must check the following file types has been entered into the “Upload file types” box inside WordPress Network Admin ▸ Network Settings page
jpg jpeg png gif mp3 mov avi wmv midi mid pdf txt js css mp4 ogv webm ogg ico zip
2-2) Import the Demo Content Sample Widgets
You can import the widgets that are used in the demo content.
- Install the Widget Importer & Exporter plugin first. It is a free plugin. https://wordpress.org/plugins/widget-importer-exporter/
- WordPress Admin → Tools → ‘Widget Importer & Exporter’, click the ‘ Browse’ button and browse to the ‘wie’ file on your computer.
- Our demo widgets located in the “Demo Contents” folder that comes with “All files and documentation” package.
- Hit “Import Widgets” button to import the slider.
Note : Before you import the widgets that come with the theme go to the WordPress widgets area and remove the widgets that WordPress has already put into the first widget container called “Sidebar For Footer (Column 1)”. It is a annoyance that WordPress does on every new install of a theme. Just make sure before the import of widgets that area is empty.
2-3) Activate the skin of your choice
After importing the demo content you can set the layout of the theme to any of the available skins. Open the Customizer and go to Styling Options ▸ Pre-Made skins and activate the skin of your choice.

