Creating a Team Member
- Home
- RT-Theme 20
- Team List / Post
- Creating a Team Member
Creating a Team Member.
Creating a Team Member is actually a straigh forward process. Use the “Team” Custom Post Type to add your Members.
- In the wordpress Admin Area goto the member Post area
- Either click on Add New Member in the Menu or the Add New Member in the top of the Post List
Things you should know
- Team Staff Members don’t have categories.
- Calling a Team / Staff members has do be done by it's id in the shortcode or select them one by one in the visual composer element settings.
- Upload a featured image by clicking the “Set featured image” link under the “Featured Image” box.
- The Team / Staff body except (short info) allows valid HTML code (h-tags, a-tags, divs). We suggest to keep it as simple as possible.
- For each Team / Staff Member item one can add :
- A Title – Position
- A Short info box for the listing pages. A small excerpt.
- 40+ links to social pages all supported with a icon
-
A complete “story” about the person into the body content of the members item post. Any valid html, shortcode is allowed but also a complete design by visual composer elements.
The Single Team member Item
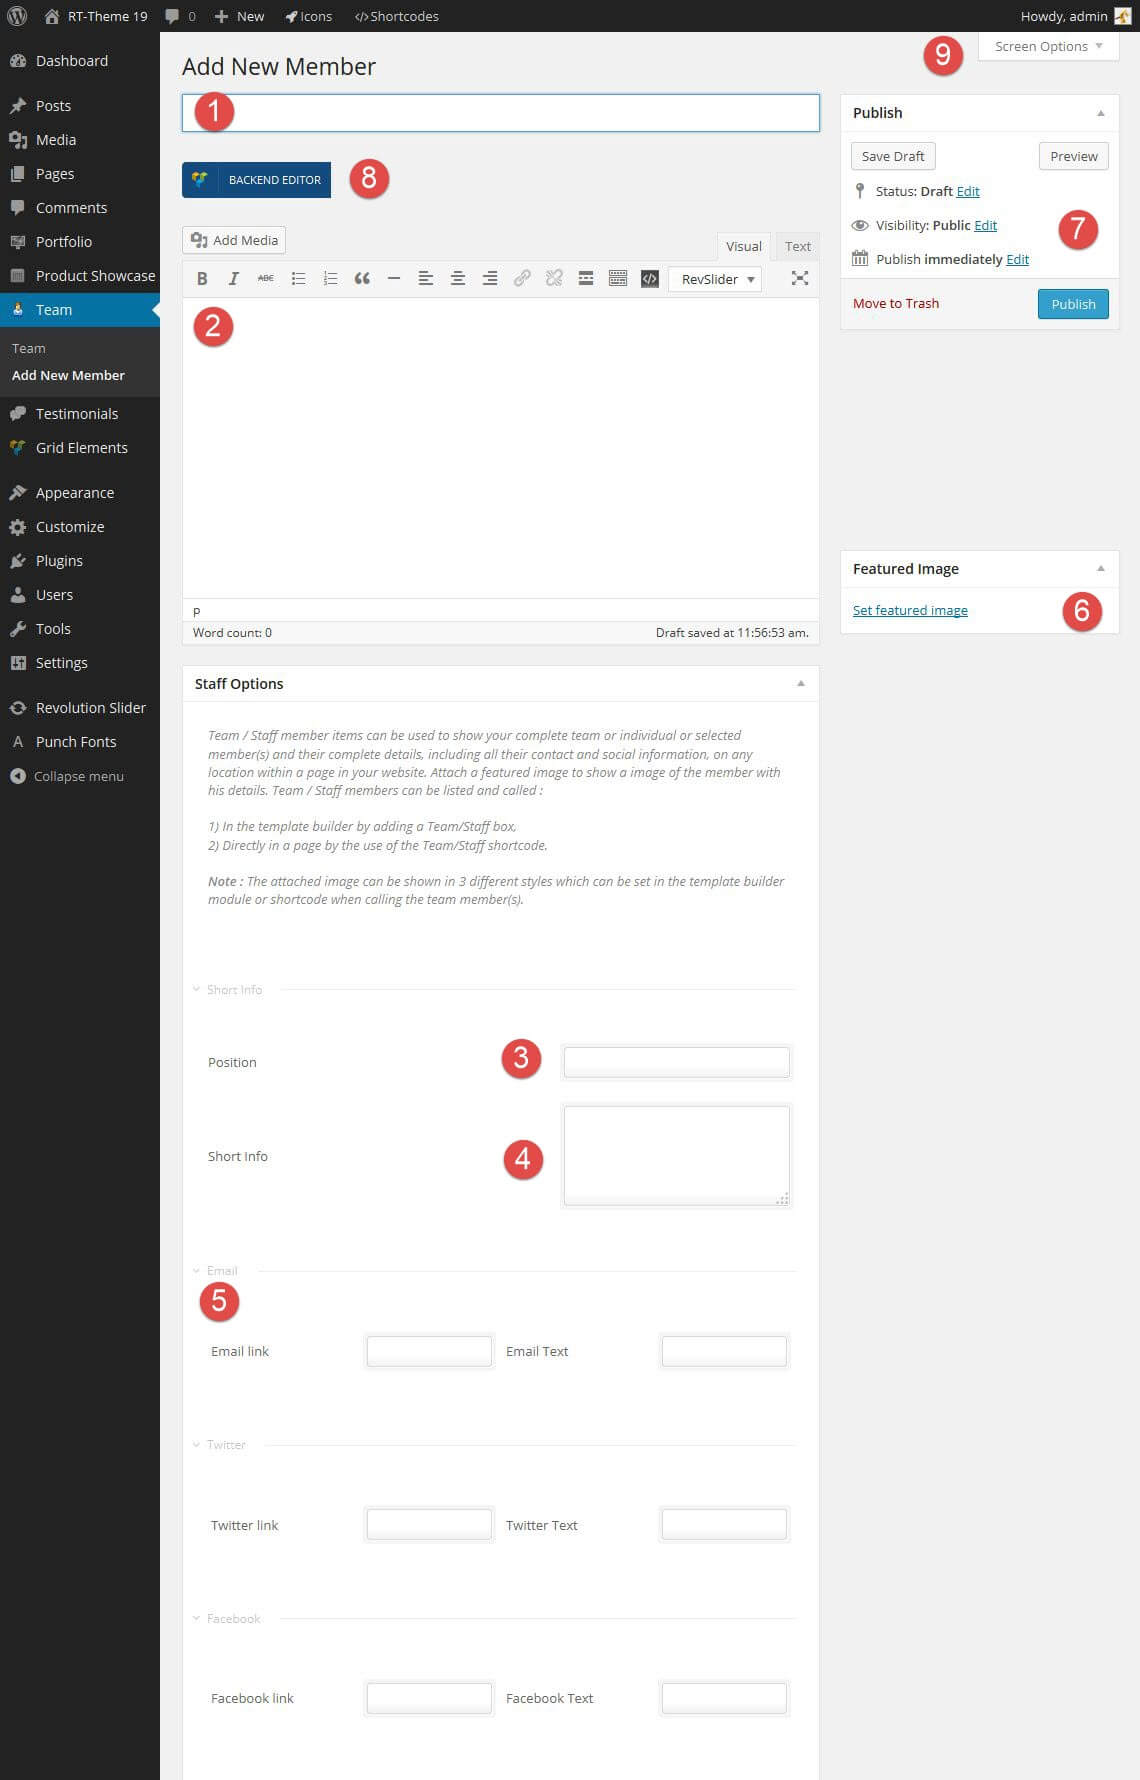
The Single Team Member item has a lot of options.
- The Title (Name) of the Team Member
- The Content of the Team Member. The story you want to tell. This info will show in the single team members page.
- The Position. His Job title.
- The short info for listing pages
-
The social icons you want to attach to this team member.
Note : Not all are shown (50+)
Note : Two icons deserve extra attention.- Email Icon. You can either enter a url or a emailaddress.
- Skype Icon. The url field should contain vaild skype formatting. Enter a skype address. Syntax : ‘skype:skypeid?call’ or ‘skype:phonenumber?call
- Attach a featured image of your team member. How does he look like.
- Publish the post. Make the post visible in the front of your website. Or change its date, visibility, set it draft and or preview it in the front of your website.
- Switch to visual composer mode to add visual composer elements or classic mode and add shortcodes or text to the team member the normal wordpress way.
- The Screen options. Enable / disable what you want to have visible in this custom posttype.
Once all settings and content is added to the portfolio item you can publish the post and it will become visible in the team member list you created in a page either by adding the team member posts shortcode or visual composer team member element to that page at the location where you want the team member list to appear.
Design Options
In the customizer the settings can be set globally for all the theme elements in pages and posts. In Rt-Theme19 the ability has been added to alter these global settings for a individual page or post. Each page or post has a section called “Design Options” with a lot of settings that can be changed for that page or post only. It gives one the ability to have a completely different look for one page or post as you can alter the background image for the body, left menu area or right side content area, a background color etc.


